Cat Nail Clippers: How to Pick and Use Them Safely
A complete guide to cat nail clippers: how the four clipper types compare, what to look for before you buy, how to find the quick on white and dark claws, and how to trim a cat who fights every session.

This article contains affiliate links. Webvet may earn a commission when you buy through them, at no extra cost to you.
Cat nail clippers come in four mechanisms (scissor, guillotine, plier, and rotary grinder), and for most cats the right answer is the simplest one: a small, sharp, scissor-style clipper sized for feline claws. The purchase is rarely where things go wrong. The cut is. You are aiming for the clear, curved hook at the very tip of the claw, in front of the pink wedge called the quick. Take that tip and nothing else, and your cat feels almost nothing.
This guide does both halves of the job, because most pages do only one. First it compares the four clipper types on the things that actually decide a purchase: how each one handles a thick claw, how most cats tolerate it, how much hand skill it needs, and how it fails. Then it walks the trim itself, including the dark-claw problem nobody teaches, what to do the moment you draw blood, and a day-by-day plan for a cat who has already decided paws are off limits.
- 1Scissor-style clippers suit most cats and most owners because the blades close from both sides of the claw and leave your sightline clear.
- 2The quick is living tissue carrying blood vessels and nerves inside the claw, so cutting the clear tip in front of it does not hurt while cutting into it does.
- 3On dark claws you cannot see the quick, so take thin slices and stop the moment the cut face looks chalky and uniform all the way across.
- 4Most adult indoor cats do well on a trim every two to four weeks, but check the claws rather than trusting the calendar.
- 5Front paws carry five claws including the dewclaw and back paws usually carry four, and the dewclaw overgrows first because it never touches the ground.
- 6Scratching posts and cat trees strip the worn outer sheath and spare your furniture, but they do not shorten the claw and never replace a trim.
- 7A claw that has curled toward or into the paw pad is a veterinary appointment, not a home trim.
The Four Types of Cat Nail Clippers, and Who Each One Suits
Strip away the packaging and every tool sold for feline claws is one of four mechanisms. Knowing which one is in your hand matters more than the brand printed on it, because each mechanism fails in a specific way. Cats have thin, curved, oval claws rather than the thick round nails a dog carries, so a tool built for a Labrador rarely does a tabby any favors.

Scissor-style clippers
Scissor-style clippers look like tiny shears with two curved, notched blades that cradle the claw and close on it from both sides. That symmetry is why they cut cleanly instead of squeezing, and the short blades keep your view of the claw tip completely open. They are the default recommendation for a reason, and an inexpensive cat-sized pair such as the Frisco Nail Clippers for Cats & Small Dogs does the same mechanical job as a boutique model.
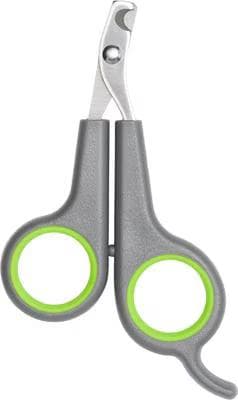
Compact scissor-style clippers sized for trimming the nails of cats and small dogs.
Webvet may earn a commission when you click through to Chewy, at no extra cost to you.
Plier-style clippers
Plier-style trimmers use a spring-loaded handle and a heavier blade set, which gives them more leverage than a small scissor pair. That extra force is genuinely useful on a big cat with dense claws or on a senior whose claws have thickened and ridged with age. The tradeoff is bulk. A plier trimmer built for medium dogs can swallow a small claw entirely, so buy the smallest version you can find.
Guillotine-style clippers
A guillotine clipper has a fixed ring you thread the claw through and a single blade that slices across it when you squeeze. It cuts well when the blade is fresh, but it asks you to feed a curved claw through a hole you cannot fully see around, and it only cuts in one direction. On a cat, that combination invites a misjudged angle. Guillotine blades also dull faster than scissor blades and are meant to be replaced.
Rotary grinders
A rotary grinder does not cut at all. It spins an abrasive head that files the claw down in layers, which removes the risk of a single deep cut and leaves a smooth edge behind. It also makes noise and vibration, which is the whole reason some cats refuse it. Grinders get a full section of their own further down.
| Clipper type | Handles thick claws | Typical cat tolerance | Skill required | Most common failure |
|---|---|---|---|---|
| Scissor-style | Good | High, quiet and quick | Low | Blade dulls and starts crushing |
| Plier-style | Excellent | Moderate, bulkier in hand | Low to moderate | Oversized jaws hide a small claw |
| Guillotine-style | Fair | Moderate, threading takes time | Moderate | Blocked sightline leads to a deep cut |
| Rotary grinder | Excellent | Low at first, improves with practice | Moderate | Noise and vibration end the session |
What is the best nail clipper for cats?
For the large majority of cats, a small stainless-steel scissor-style clipper is the best tool. It cuts a thin, curved claw cleanly from both sides, it is short enough that your fingers sit close to the work, and nothing on the tool blocks your view of the tip you are removing. Move up to a plier-style trimmer only if your cat's claws are thick enough that a scissor pair feels like it is straining, and move to a grinder only if your cat tolerates the sound.
Which cat nail clippers are best for beginners?
Beginners should buy a small scissor-style clipper and skip every feature that promises to make the job foolproof. The reason is sightline. A first-timer's biggest risk is misjudging where the quick ends, and the tool that shows you the most claw is the tool that protects you best. Guillotine clippers add a threading step under time pressure, and grinders add noise that a nervous handler tends to rush. Start simple, take one claw, and build from there.
Safety Guards, LED Lights, and Magnifiers: An Honest Verdict
Clipper listings sell guards, lights, and magnifiers as pure upside. They are not. Each one solves a real problem on paper and creates a smaller one in your hand, and on a claw the size of a grain of rice those small problems matter.

Do cat nail clippers with an LED light or magnifier actually help?
They help less than the listing implies. An LED lights the claw from the side, which does make a pale claw easier to read in a dim room, but it does not shine the quick into view inside a dark claw the way people expect. Magnifiers have a fixed focal distance, so the claw is only sharp when your hand happens to sit at exactly the right range, and a squirming cat rarely cooperates. A bright lamp and a fresh blade beat both accessories.
Here is the practical read on each feature:
- Safety guard: a plastic stop that limits how much claw enters the blades. On dog nails it works. On a small feline claw it often hides the exact tip you are aiming at, and it can push you to take more than you meant to. Many owners end up removing it.
- LED light: modest help on white or clear claws in poor lighting. Little help on black claws, which is where people actually want it.
- Magnifier: narrow benefit, fixed focus, and one more thing between your eye and the claw. Skip it unless your close vision genuinely needs it.
- Blade lock or safety catch: genuinely worth having. It keeps the blades closed in a drawer so they stay sharp and nobody reaches into an open edge.
Grinders and Automatic Trimmers: When They Beat Clippers
Searches for an automatic cat nail trimmer almost always land on a rotary grinder, so it is worth saying plainly: there is no device that trims a cat's claws by itself. A grinder is a small motorized file you hold and guide, and the "automatic" part is only the spinning head. Used well it is an excellent tool, particularly on the thick, brittle claws that make a scissor clipper feel like it is fighting back. A quiet cordless model like the PATPET Steel Grit Dog & Cat Nail Grinder is the style most owners try first. If you are shopping for a dog instead, our guide to the best dog nail grinders compares noise, speed control, and heat safety.

Is it better to cut or grind cat nails?
For most cats, cutting is better. It is faster, silent, and over in seconds, which matters more to a cat than precision does. Grinding wins in three situations: claws too thick for a clean cut, dark claws where you want to remove length in tiny increments and inspect as you go, and cats who have learned to hate the click of a clipper but do not mind a hum. Grinding also leaves a rounded edge that snags fabric less than a fresh cut does.
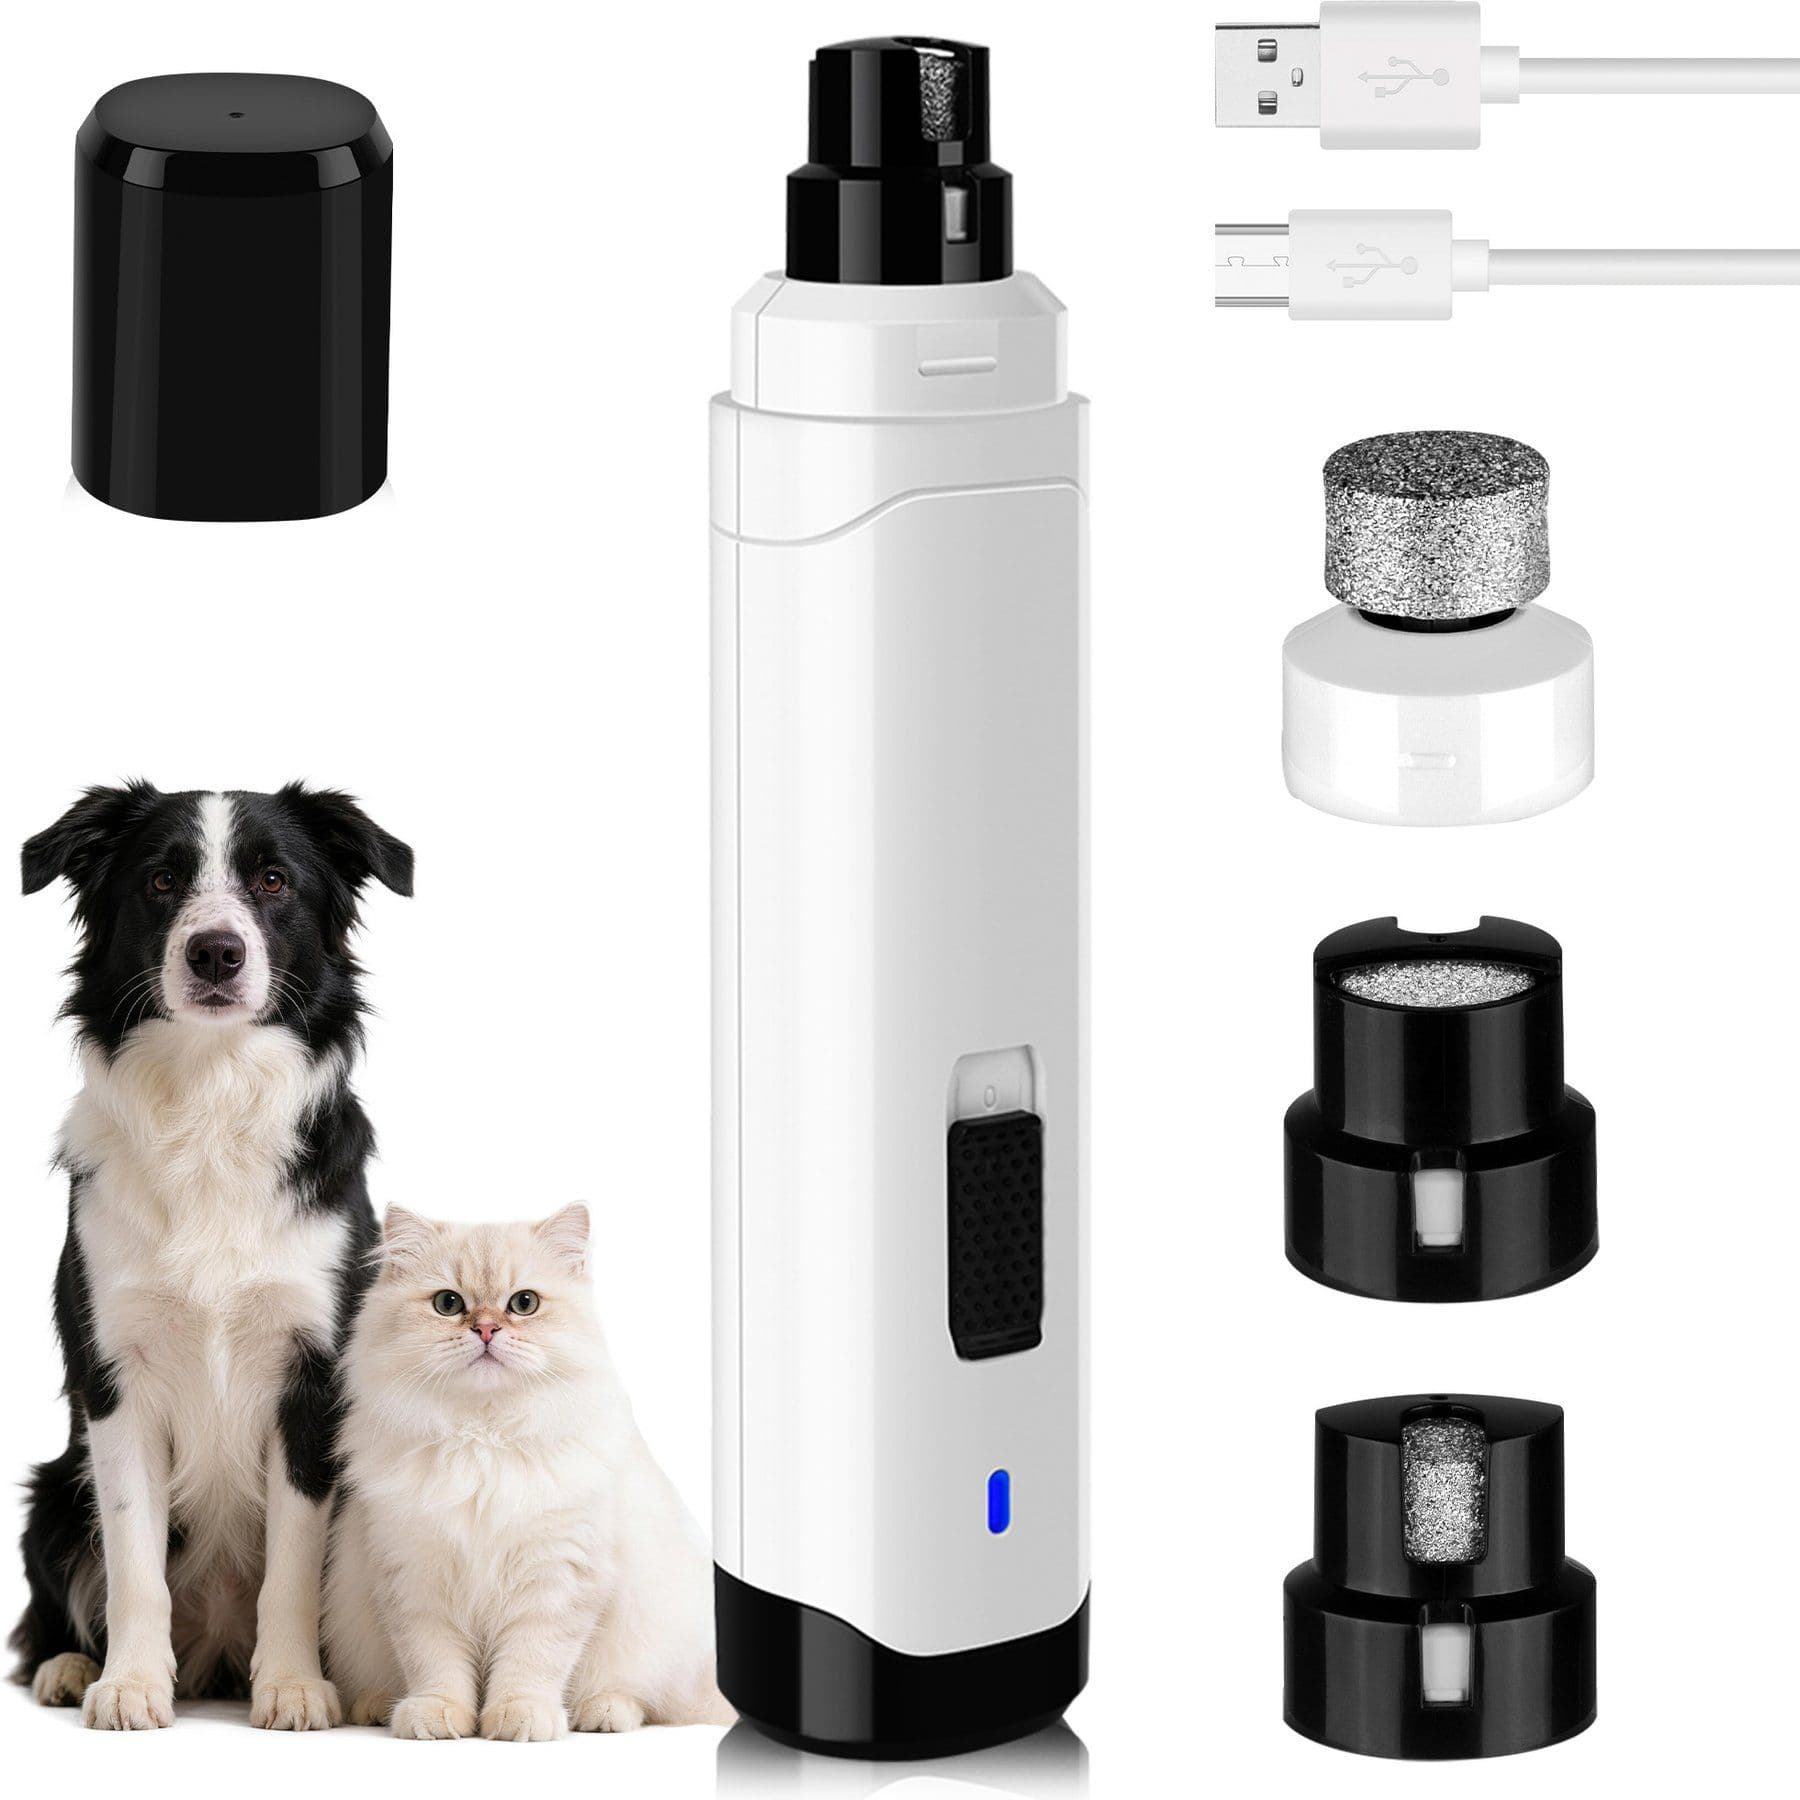
Webvet may earn a commission when you click through to Chewy, at no extra cost to you.
Use a grinder when:
- Your cat's claws are thick, ridged, or brittle enough that a clipper crushes rather than slices.
- You are working on black claws and want to shave off layers instead of committing to one cut.
- Your cat has become clipper-shy and needs a genuinely different experience, not the same tool again.
Skip the grinder when:
- Your cat startles at appliance noise. Vibration plus sound is a lot to ask of a fearful cat.
- You have a long-haired cat and cannot keep the coat clear of the spinning head. Fur wrapping a grinder is the one hazard clippers do not have.
- You are in a hurry. Grinding takes several times longer per claw than clipping.
Never hold a grinder against one spot for more than a second or two. Friction builds heat inside the claw, and a claw that gets hot is the fastest way to teach a cat that the tool is bad news. Touch, lift, inspect, repeat.
What to Look For Before You Buy
Once you have picked a mechanism, the rest of the decision comes down to four things. None of them are exotic, and none of them require a professional-grade price.
- Blade material and edge. Stainless steel holds an edge and resists rust from cleaning. A cheap plated blade goes dull fast, and a dull blade is the single biggest cause of split claws.
- Scale. The jaw opening should be barely wider than your cat's claw. Oversized jaws hide the tip and encourage a deeper cut than you intended.
- Handle and grip. You need a confident hold with one hand while the other holds a paw. Rubberized handles and a spring return both help.
- A lock. A clipper that closes and latches stays sharp in a drawer and is safer to store.

The dull-blade check nobody mentions
A cat who suddenly starts fighting a trim they used to tolerate is often reacting to a dull blade rather than to you. A blunt edge does not slice the claw, it compresses it, and that pressure travels up into the toe. The claw then splits or frays instead of parting cleanly.
Check the edge this way:
- Look at the blades in good light. A sharp edge shows a fine bright line. A rounded, matte edge is spent.
- Cut a strip of thin cardboard or a dry piece of spaghetti. A sharp clipper parts it silently and cleanly. A dull one crushes it or needs two attempts.
- Watch your last few trims. Frayed, flattened, or splintered claw ends mean the blade is finished.
Wipe the blades dry after every session, keep them out of a humid bathroom drawer, and plan on replacing an everyday scissor clipper roughly once a year with normal use. Guillotine blades are consumable by design and should be swapped on the manufacturer's schedule.
What are professional cat nail clippers, and do you need them at home?
"Professional" on a clipper package usually means heavier construction, a stronger spring, and a better blade, and it is often a plier-style tool built for volume work in a clinic or grooming salon. A well-made trimmer such as the Safari Professional Nail Trimmer is genuinely durable, but you do not need that build quality to trim one cat every few weeks. Buy a good small clipper and keep it sharp, and you will match a professional tool's results at home.
How Often Cats Need a Trim
Every cat carries eighteen claws: five on each front paw, including the dewclaw sitting higher up on the inside of the leg, and usually four on each back paw. Polydactyl cats carry extras. The dewclaw is the one people miss, and because it never touches the ground it does not wear at all, which makes it the claw most likely to curl into the leg.
| Life stage | Typical trimming interval | What to watch for |
|---|---|---|
| Kitten under 6 months | Every 1 to 2 weeks | Fast growth and needle-sharp tips |
| Adult indoor cat | Every 2 to 4 weeks | Clicking on hard floors, snagged fabric |
| Adult with outdoor access | Every 3 to 6 weeks, checked monthly | Uneven wear, chipped or torn claws |
| Senior or arthritic cat | Every 1 to 3 weeks | Thickening, ridging, less scratching, curled dewclaws |
How often should I cut my cat's nails?
Most adult indoor cats do well with a trim every two to four weeks, but treat that as a checking rhythm rather than a rule. Claw growth varies with age, activity, and how much a cat scratches. The reliable signals are audible clicking on hard floors, claws catching in blankets or your clothes, and a tip that stays visible when the paw is at rest. Run a thumb along each toe once a week and let the claws tell you when they are ready.
Do vets recommend clipping cats' nails?
Yes. Routine nail trimming is standard advice from veterinary sources including VCA and the American Animal Hospital Association, and it is treated as basic preventive care rather than grooming vanity. Overgrown claws snag and tear, they can curl back into the paw pad and cause a painful infected wound, and they make ordinary handling and play riskier for everyone in the house. Trimming also gives you a weekly excuse to inspect paws for cuts, swelling, and debris.
Why Scratching Posts and Cat Trees Do Not Replace Trimming
This is the most common misunderstanding in cat nail care, and it comes from a reasonable place: a cat who scratches regularly does seem to have tidier claws. The mechanism explains why that impression is only half right.
A cat's claw grows in layers, like an onion built around the quick. Scratching is not sandpaper. It hooks the claw into a resistant surface and pulls, which strips off the worn outer sheath and exposes the newer, sharper layer underneath. That is why you find hollow crescent-shaped shells at the base of a scratching post. The claw is not shorter after a scratching session. It is cleaner and, if anything, sharper.

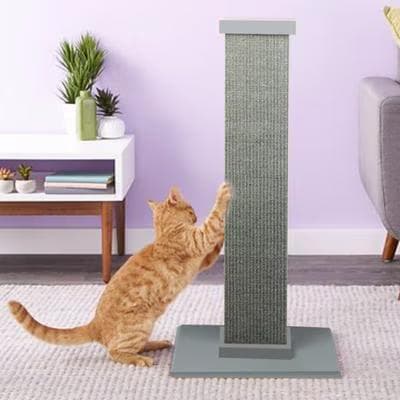
Webvet may earn a commission when you click through to Chewy, at no extra cost to you.
Will a scratching post or cat tree keep my cat's nails short enough to skip trimming?
No. A good scratching surface does real work: it sheds the dead outer sheath, satisfies a hardwired stretching and marking behavior, and redirects claws away from your sofa arm. What it does not do is shorten the claw or touch the dewclaw, which never contacts a post at all. A cat with a well-placed post still needs a trim every few weeks. The post reduces damage to your home. The clippers control length.
That still makes a scratching surface worth having, and where you put it matters more than what it costs. A wall-mounted option like the Necoichi Premium Comfort Cat Scratcher Wall covers the vertical stretch in a home with no floor space to spare, and a simple upright such as the Frisco 21-in Sisal Cat Scratching Post handles the same job for a cat who prefers a free-standing target. For a taller free-standing target, the SmartCat Ultimate Scratching Post gives an adult cat more room to stretch. Whichever format you choose, three things decide whether it actually gets used:
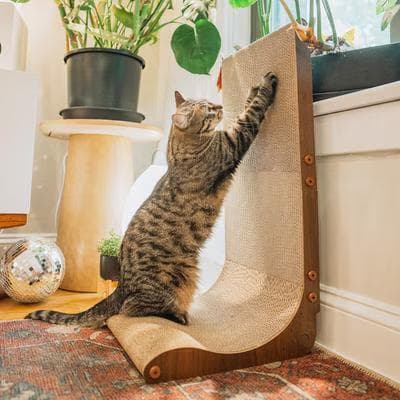
Curved cardboard wall scratcher with a wood frame that protects walls and gives cats a satisfying vertical scratch surface.
Webvet may earn a commission when you click through to Chewy, at no extra cost to you.
- Put it where your cat already scratches and where they wake up or greet you, not in a spare room where nobody spends time.
- Offer one vertical surface and one horizontal surface, because most cats have a strong preference and few owners guess it correctly.
- Stability beats height. A post that rocks or slides under a determined cat gets abandoned after one attempt.
Cats who are shredding furniture usually need height as well as texture. A full tower like the Yaheetech Multi-Level 63-in Plush Cat Tree gives a cat somewhere to climb, perch, and stretch to full body length, which is the posture a sofa back is standing in for. If you are choosing between formats, our guide to cat trees and scratching posts walks the whole category, and the tallest cat towers round-up covers the vertical end of it. Buy for where your cat actually scratches, then keep trimming on schedule anyway.
Find the Quick Before You Cut
Every safe trim starts with the same question: where does the living part of the claw stop? The quick is the pink core inside the claw that carries the blood supply and the nerve endings. The clear or white hook beyond it is dead keratin, the same as the free edge of your own fingernail. Cutting the hook is painless. Cutting the quick hurts and bleeds.

Is cutting nails painful for cats?
Not when it is done correctly. The tip you remove has no blood supply and no nerve endings, so a properly placed cut registers as pressure at most. Pain happens when the blade goes into the quick, when a dull blade crushes and splits the claw instead of slicing it, or when a cat is held so tightly that the restraint itself is the problem. Most cats who "hate having their nails cut" are reacting to one of those three things rather than to the trim.
On a white or clear claw the method is simple. Press gently on the top of the toe and the pad beneath it to extend the claw, look for the pink wedge, and place your blade two to three millimeters beyond where the pink ends. If you cannot see pink, the claw is either dark or the light is poor. Move to a window or a lamp before you cut anything.

How do I trim a cat's black or dark nails when I cannot see the quick?
You work by cross-section instead of by color, and you go slowly. Take a very thin slice off the tip, then look at the cut face straight on before you cut again. A slice that is still safely in dead keratin looks chalky, dry, and uniform all the way across. As you approach the quick, a small darker or glossier circle appears in the center of that face. That circle is your stop sign. Cut no further on that claw.
The dark-claw routine in order:
- Extend the claw and shine a lamp on it from the side.
- Remove the hooked tip only, roughly one millimeter.
- Look at the flat cut face head on.
- Chalky and uniform means you may take one more thin slice.
- Any dark, glossy, or moist center means stop immediately and move to the next claw.
- When in doubt, leave length. You can always take more in a week.
How to Trim Without Hitting the Quick
Set up before you pick up your cat. Everything you need should already be within reach: clippers, a treat your cat genuinely loves, and styptic powder open and ready in case you need it.

- Sit where you are comfortable. A lap, a sofa, or a table at waist height all work. Fighting your own posture makes your hands unsteady.
- Take one paw and hold it lightly. No gripping. Your cat should feel supported, not trapped.
- Extend one claw. Place your thumb on the top of the toe and your index finger on the pad below, then press gently. The claw comes out on its own.
- Find the quick, or find the chalky face. Do not cut until you know where you are.
- Position the blades across the claw, not along it. Cut top to bottom through the curve of the claw rather than side to side. A side-to-side cut flattens the claw and encourages splitting.
- Cut once, cleanly, and let go. One decisive squeeze. Hesitating mid-cut is what crushes a claw.
- Reward immediately. A treat within a second or two, every single time, whether you finished one claw or ten.
Work front paws first. They are the ones that snag furniture and skin, and back claws stay shorter naturally from walking. Do not forget the dewclaw on each front leg, sitting higher up on the inside where it never touches the floor. There is no rule that says all eighteen claws happen in one sitting. Two claws a day for nine days is a complete trim and a far better experience for a cat who dislikes the process.
If You Cut Too Short: Stopping the Bleeding
It happens to experienced groomers and it will probably happen to you at some point. A claw that bleeds is alarming to look at and is almost never an emergency. What matters is that you stay calm, because your cat is reading you far more closely than the claw.

What should I do if I cut the quick and my cat's nail bleeds?
Press styptic powder onto the cut end and hold steady pressure for a minute or two. Styptic powder such as Kwik Stop Styptic Powder contains a clotting agent and works within seconds, and it belongs in the room before you ever pick up a clipper. If you do not have it, plain cornstarch or all-purpose flour packed onto the tip is a reasonable household substitute. Keep your cat quiet and off carpet for a few minutes so the clot sets.
Call your veterinarian if:
- Bleeding continues after ten minutes of firm, steady pressure.
- The claw was crushed, torn, or split rather than cleanly cut.
- Your cat keeps licking or chewing the toe hours later, or holds the paw up when walking.
- The toe swells, smells, or feels warm over the following days.
End the session there. Do not try to finish the paw after a quick cut, because the association you set in that moment is the one your cat will remember next time. Offer a treat, let the cat leave, and come back tomorrow.
Trimming a Cat Who Will Not Sit Still
A cat who yanks their paw away, growls, or leaves the room at the sight of clippers is not being difficult. They are telling you the tool arrived faster than their tolerance for it. The fix is not a stronger grip. It is a shorter session repeated more often.

How do I get my cat used to having their paws handled?
Build it in steps and let your cat set the pace. Spend a few days on each rung and only move up when the current one is boring rather than tolerated. A treat closes every single session, including the ones that end after two seconds.
- Days 1 to 3. Touch a paw while your cat is relaxed and dozing. One second, treat, done.
- Days 4 to 6. Hold the paw briefly and press the pad so a claw extends. Release before your cat pulls away, then treat.
- Days 7 to 9. Bring the clippers into the room. Do not open them. Let your cat sniff, then treat.
- Days 10 to 12. Touch the closed clippers to a claw with no cut at all. Treat.
- Days 13 to 15. Trim exactly one claw. Stop even if the cat seems fine. Treat.
- Day 16 onward. Add a claw at a time, and go back a step the moment you meet resistance.
Restraint should reduce stress, not create it. A few holds that work:
- The lap hold. Cat facing away from you, back against your stomach, one paw at a time lifted from underneath.
- The elbow tuck. Cat tucked against your side with your forearm along their body, working the near front paw.
- The towel wrap. For a serious squirmer, wrap the body snugly in a towel with one leg free at a time. It calms most cats and protects both of you.
- Sleepy timing. Catch your cat in the first minutes after a nap or right after a meal, never mid-zoomies.
If your cat escalates from squirming to hissing, swatting, or biting, stop for the day. Pushing through turns a mildly unpleasant task into a fear response you will spend months undoing.
Kittens, Seniors, and Overgrown Claws
The trimming job changes at both ends of a cat's life, and so does the risk of leaving it too long.

Kittens are the easy case, because a cat who was handled as a kitten usually accepts trimming for life. Start touching paws in the first weeks you have them, long before the claws need cutting. Kitten claws are needle-sharp and grow quickly, so a light trim every one to two weeks is normal, and each session should be short and end in food.
Seniors are the hard case. Older cats scratch less, so the outer sheath stops shedding and the claw thickens, ridges, and grows more brittle. Arthritis can make extending a claw uncomfortable, and a cat who cannot groom or stretch normally will not maintain their own claws at all. Check a senior's paws weekly and expect to trim more often, not less.

Some overgrown claws are past the point of a home trim. Take your cat to a veterinarian rather than reaching for clippers if:
- A claw has curled around and is touching, pressing into, or has pierced the paw pad.
- The toe is swollen, red, discharging, or painful when touched.
- The claw is so thick that your clipper compresses it instead of cutting.
- Your cat limps, licks one toe repeatedly, or will not bear weight on the paw.
Large and heavy cats face this earlier than most, partly because a flimsy scratching surface tips or slides under their weight and they stop using it. If that describes your cat, a sturdier setup helps, and our guide to cat trees for large cats covers weight capacity and base stability. It still does not replace the trim.
Alternatives People Ask About: Nail Caps, Declawing, and Human Clippers
Three alternatives come up constantly in this conversation. One is a limited tool, one is a surgery that major veterinary bodies oppose, and one is a compromise that works on small claws and fails on thick ones.
Are nail caps a safe alternative to clipping?
Nail caps are soft vinyl covers glued over each trimmed claw, and products like Soft Claws Cat Nail Caps are widely used to protect furniture or to stop a cat from scratching a healing skin wound. They are considered safe when applied correctly, but they are damage control rather than nail care. The claw keeps growing underneath, the caps fall off as the outer sheath sheds, and they typically need replacing every four to six weeks. Applying them requires trimming the claw first, so caps add a step to nail care instead of removing one.
Is declawing an alternative to trimming?
No, and it should not be framed as one. Declawing (onychectomy) is not a nail removal. It is the amputation of the last bone of every toe, and it is opposed or strongly discouraged by major veterinary organizations including the American Association of Feline Practitioners and the American Veterinary Medical Association. Reported complications include chronic pain, lameness, and behavior changes such as litter box avoidance and biting. Routine trimming, appropriate scratching surfaces, and nail caps address the underlying problem without surgery.
Can I use human nail clippers on my cat?
You can on a kitten or a cat with fine claws, and plenty of owners do it successfully in a pinch. The limitation is the geometry. A human clipper has two flat blades that squeeze a curved feline claw from top and bottom, which flattens it before it cuts. On a thin claw that still parts cleanly. On a thick senior claw it crushes and splits, and a split claw can tear up into living tissue. A cat-sized scissor clipper costs very little and removes the problem entirely.
When to Hand the Job to a Vet or Groomer
There is no prize for doing this yourself. A veterinary technician or an experienced groomer can trim a difficult cat in a couple of minutes with handling skills that take years to build, and many clinics will do it as a quick nurse appointment.
Book it out rather than fighting it at home when:
- Your cat redirects aggression onto you, hisses persistently, bites, or panics at the sight of the tool.
- A claw has already grown into the paw pad, or a toe looks infected.
- You cannot restrain your cat safely on your own and have nobody to help.
- Your cat is a senior with thick, brittle claws that your clipper cannot cut cleanly.
- You take blood twice in a row and both of you are now dreading it.
Ask the clinic to show you their hold while they work. Watching someone competent do it once is worth more than any written instruction, including this one, and most cats do better at home once the handler is confident.
Frequently Asked Questions
Are my cat's nails too long?
The clearest signs are audible clicking as your cat walks across a hard floor, claws catching in carpet, blankets, or your clothing, and a claw tip that stays visible past the fur when the paw is resting. Look at the curve as well as the length. A healthy claw ends in a straight-ish hook, while a claw that has started to arc back toward the pad is overdue and needs attention now.
Why is it important to trim my cat's nails?
Overgrown claws catch and tear, which is painful and can bleed. Left long enough, a claw can curl into the paw pad and cause an infected wound that needs veterinary treatment. Shorter claws also mean less shredded furniture, fewer accidental scratches during play, and less risk for anyone in the household on blood thinners or with fragile skin. A regular trim doubles as a weekly paw inspection.
How should I restrain my cat for a nail trim?
Use the lightest hold that works. Most cats do best sitting on a lap facing away from you, with their back against your stomach and one paw lifted from underneath. A snug towel wrap with one leg free calms a cat who squirms hard. Work at a comfortable height so your hands stay steady, keep sessions short, and stop before your cat reaches the end of their patience.
What is the difference between guillotine-style and scissor-style clippers?
A guillotine clipper has a fixed ring you thread the claw through and one blade that slices across it. A scissor clipper has two curved blades that close on the claw from both sides. Scissor clippers are the better fit for cats because you can see the entire claw while you cut and the blade approaches from a direction you choose. Guillotine blades also dull faster and are designed to be replaced.
Do outdoor cats need their nails trimmed?
Usually yes, just less often. Climbing, digging, and walking on rough surfaces wear the front claws somewhat, but that wear is uneven and it never touches the dewclaw. Cats with outdoor access also need intact claws for defense and climbing, so trim conservatively: take the sharp hook off and leave more length than you would on a strictly indoor cat. Check the paws monthly for chips and tears.
What kind of scratching post or cat tree should I buy?
Buy for texture, height, and stability first. Most cats prefer sisal rope or corrugated cardboard, want a post tall enough to stretch out fully, and abandon anything that wobbles. Offer both a vertical and a horizontal option, and place them where your cat already scratches. Our full guide to cat trees and scratching posts covers materials, sizing, and placement in detail.
Which cat tree works for a big or heavy cat?
Look at weight capacity, base footprint, and perch dimensions rather than overall height. A large cat needs perches deep enough to lie on without hanging over the edge and a base wide enough that the tower does not rock when they jump. Thicker posts also survive heavier scratching. Our guide to cat trees for large cats breaks down the models built for that load.
Sources

Editor
The Webvet Editorial Team is the in-house group of pet-care editors and writers behind Webvet, operated by Smart Pet Collective. The team researches, writes, and maintains Webvet's pet health, behavior, and medication content. Every article follows a defined editorial process: research from reputable veterinary and scientific sources, careful drafting, mandatory review of medical content by a credentialed veterinarian, and dated publication. Health and medication articles are medically reviewed by a licensed veterinary professional before they go live and are kept current over time.


