How to Use Dog Clippers: A Safe Step-by-Step Guide
Learn how to use dog clippers safely at home, including coat preparation, guard comb choice, clipping direction, sensitive-area technique, blade cooling, and when to stop.

BVMS MRCVS
Medically reviewed by Dr. Pippa Elliott, BVMS MRCVS · Last reviewed

This article contains affiliate links. Webvet may earn a commission when you buy through them, at no extra cost to you.
Learning how to use dog clippers starts before the blade touches fur. Brush out tangles, work on a clean and completely dry coat, choose a conservative guard comb, and let your dog become comfortable with the sound and vibration. During the clip, keep the blade flat, use light pressure, and check its temperature often.
Grooming a dog with clippers can be a manageable home task when the dog is calm, the coat is in good condition, and the haircut is simple. It is not the right do-it-yourself project for tightly matted fur, painful skin, panic, or delicate corrective work. This guide gives beginners a safe sequence while making those stop points explicit.
- 1Start with a clean, dry, fully brushed coat. A guard comb cannot glide safely through tangles or mats.
- 2Use a longer guard comb for the first pass, hold the clipper blade flat, and move with light, steady pressure.
- 3Clip with the direction of coat growth for a longer, more forgiving finish. Against-coat passes cut shorter and require more skill.
- 4Check blade temperature throughout the session. Stop, clean, oil, swap, or cool a blade that feels hot.
- 5Stop for pain, panic, broken skin, severe matting, or any body area you cannot see and control safely.
Can You Groom Your Dog With Clippers at Home?
Yes, many owners can maintain a simple pet trim at home with dog-specific clippers. Good first projects include shortening an even coat on the torso, tidying an already maintained outline, or doing a small sanitary cleanup after a groomer has demonstrated the technique. The safest home goal is comfort and coat maintenance, not a salon-perfect finish.
Start by assessing the dog, not the haircut. Your dog should be able to stand or lie comfortably on a stable, nonslip surface and accept gentle handling. The coat should be free of skin-level mats. If the clipper sound causes trembling, escape attempts, growling, snapping, or frantic movement, pause and work on helping an anxious dog settle before attempting a full trim.
Introduce the clippers before the haircut
Break acclimation into very short steps. Let your dog investigate the switched-off clipper, reward calm behavior, then turn it on several feet away. On a later repetition, briefly touch the non-blade end of the running clipper to the shoulder so the vibration is predictable. End while the dog is still comfortable instead of waiting for fear.
Use tiny rewards that your dog already tolerates. Vital Essentials beef nibs are one compact option for dogs who can eat beef, but any reward must fit the dog's diet and daily calorie allowance. Food should support a calm training plan, not persuade a distressed dog to endure a session.

Small beef nibs can serve as high-value rewards during short clipper-conditioning sessions. Count rewards within your dog's daily calories.
Webvet may earn a commission when you click through to Chewy, at no extra cost to you.
Know when to book a professional groomer
Professional help is the safer choice when fur is tightly matted to the skin, the dog has a history of biting during handling, the haircut requires close work around the eyes or genital area, or you cannot identify the direction of skin folds under the coat. The AKC's home-grooming guidance also cautions owners against attempting complicated clipping without training and recommends professional care for sensitive areas.
A veterinarian should evaluate open sores, hot spots, draining areas, lumps that bleed, marked pain, or a sudden coat change before you clip over it. Removing fur can expose a problem, but a home haircut cannot diagnose or treat the underlying skin condition.
How to Choose Dog Clippers, Blades, and Guard Combs
Choose dog grooming clippers by coat workload, not by the number of accessories in the box. Fine touch-ups may suit a light cordless model, while long, dense, or thick coats place more demand on the motor and blade. Corded clippers provide continuous power; cordless dog clippers give easier movement but depend on battery life and charging habits.
Noise and vibration matter when a dog is sensitive. Quiet dog hair clippers can make acclimation easier, but a low-noise label does not guarantee that a particular dog will accept the tool. Balance sound, motor strength, weight, grip, blade availability, and the manufacturer's service options.
Heavy-duty dog clippers can be useful for dense coat workloads, but more power does not make a short setting safer or eliminate the need for blade cooling. Match the clipper to the coat, then choose the longest practical guard for a cautious first pass.
Know the parts before you start
The clipper body houses the motor or drive system. The metal clipper blade does the cutting. Removable guards are clipper attachments that fit over a compatible blade to leave more coat; each is also called a guide comb or guard comb. Blade oil reduces friction at the cutting surfaces, while a small brush removes loose hair after the unit is unplugged or switched off.

| Coat or goal | Conservative starting setup | What to watch |
|---|---|---|
| First home trim | A longer guard comb on a manufacturer-compatible blade | Confirm the guard is seated securely and test a hidden shoulder area. |
| Long, clean, brushed coat | Longer guard first, then reassess | Work in small sections so the guard reaches the coat evenly. |
| Dense or thick coat | Motor and blade rated for the workload | Do not force a slowing clipper. Stop to clear hair and check heat. |
| Shorter finish | Shorter guard only after a successful test pass | Shorter settings expose skin irregularities and leave less room for error. |
| Tangled or matted coat | Do not push a guard through it | Mats must be removed first. Skin-level or extensive mats need professional care. |
| Sensitive body area | Use only the setup and method demonstrated for that area | Skin folds, nipples, joints, ears, paws, and groin can catch or move unexpectedly. |
What Professional Groomers Look for in Dog Clippers
Professional groomers often value sustained power, predictable blade motion, replaceable or serviceable parts, blades and guard combs available in the lengths they use, a grip they can control for long periods, and a cooling plan that supports repeated work. They may use more than one clipper or blade so a hot or unsuitable setup never has to be forced.
Home users need the same fundamentals at a smaller scale: a dog-specific clipper that can handle the coat, a compatible blade and guard, clear manufacturer directions, clipper oil, a cleaning brush, a metal comb, and a backup plan if the dog or equipment is not cooperating. The best setup is the one you understand and can stop using safely.
- Read the clipper and blade manuals before attaching a guard, removing a blade, oiling, or using a cooling product.
- Choose a longer finished length than you think you need for the first pass. You can remove more coat later.
- Check that the guard teeth are straight, secure, and free of trapped hair before every pass.
- Keep a second compatible blade available if the coat and session length are likely to create heat.
Prepare Your Dog's Coat Before Clipping
A dog should be brushed, bathed when appropriate, and completely dry before an even clip. Brush and comb to the skin before bathing because water can tighten existing tangles. The VCA coat-care guide explains that severe mats are safest with professional help and that brushing before a bath prevents tangles from becoming harder to manage.

After routine grooming, HICC PET deodorizing glove wipes can help collect loose hair and freshen a healthy coat between baths. They are not a shortcut for clipping a dirty, damp, tangled, or irritated coat, and they should not be used over open skin.

Wearable deodorizing wipes can lift loose hair and freshen a healthy coat between baths. Do not use them to replace proper pre-clip washing and drying.
Webvet may earn a commission when you click through to Chewy, at no extra cost to you.
Bathing is useful when the coat is oily, dusty, or carrying product buildup, but use a dog-appropriate shampoo and rinse thoroughly. Towel-blot rather than rubbing the coat into new tangles. A damp coat can clump in the guard, pull, leave tracks, and conceal how much length is being removed.
How Groomers Dry Dogs Before Clipping
Professional groomers dry dogs efficiently with coat-appropriate salon equipment, practiced handling, controlled airflow, and a brushing plan. That does not make high heat safe. At home, towel-blot, use a pet dryer only as directed, keep airflow moving, and monitor skin temperature and stress. Never trap a dog in an unmonitored drying setup.
Drying is also coat preparation. Lift and separate the hair while checking that the comb can travel from skin to tip. Pay attention behind the ears, under the collar, in the armpits, along the belly, and around the tail, where small tangles can hide.
Do a skin and tool check
Part the coat in several places and look for redness, scabs, moisture, flea dirt, swelling, or tenderness. If you find unexplained changes, read our overview of skin issues in dogs and arrange veterinary care when the skin is painful, broken, spreading, or accompanied by illness.
Before switching on the clipper, confirm that the blade is clean, correctly installed, and lightly oiled according to the manufacturer. Make sure the cord cannot wrap around the dog, or confirm that the cordless battery can finish a short session without fading.
 $65 · no membership
Have a health question about your dog?
A licensed vet can assess your dog over video and prescribe online when it's appropriate.
 Talk to a vet
- Licensed vets
- All 50 states
- same-day Rx
Webvet may earn a commission if you book.
Adjust Your Technique by Coat Type and Body Area
Long, curly, and thick coats
Long hair must be separated and combed before the guard can control length. Work in smaller sections and clear packed hair from the guard frequently. Curly coats can hide direction changes, while thick coats can load the motor and create heat more quickly. If the clipper repeatedly stalls or leaves chewed-looking tracks, stop rather than making more passes over the same skin.
A close haircut is not a cure for coat care. Brushing and combing must still match the coat between clips. If a mat is small and loose enough to comb without pulling skin, address it before clipping. If it is tight, broad, painful, wet, contaminated, or attached near delicate skin, a professional should choose the removal method.
Dog clippers for matted hair are not a safe workaround for coat preparation. If you are searching how to use dog clippers on matted fur, the first step is to stop and assess how tightly the mat grips the skin. A guard cannot pass through it safely. Small dog sanitary trim clippers also require clear visibility, controlled skin, and training before they are used near delicate tissue.
Legs and feet
Legs are narrow, curved, and easy to rotate unexpectedly. Support the limb in a natural position and clip only where you can keep the blade flat. Around feet, spread no webbing into the blade path and do not chase hair between pads if you cannot see the skin. A small trimmer may be appropriate only when its directions and your training cover that use.
Persistent redness, chewing, odor, swelling, or paw licking is a reason to stop and investigate discomfort before clipping more closely. After grooming healthy pads, Pet MD paw balm is an optional finishing product. Do not put balm over a cut, sore, hot spot, or inflamed area.
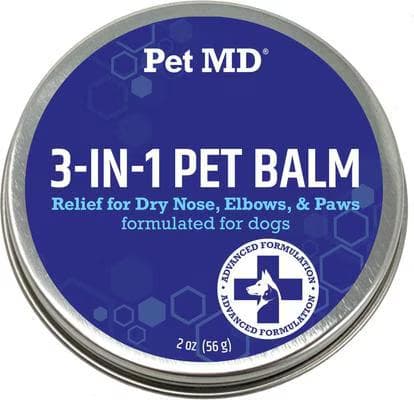
Paw balm is an optional finishing step for clean, healthy, dry paw pads after grooming. Do not apply it over cuts, sores, or inflamed skin.
Webvet may earn a commission when you click through to Chewy, at no extra cost to you.
Armpits, belly, groin, and sanitary areas
Sensitive areas require extra restraint, full visibility, and more experience than a broad torso pass. The underbody combines thin skin, folds, nipples, genital tissue, and sudden movement. Flatten and expose the skin before every short pass, and never clip blindly under a leg or through a fold. If the dog will not hold still or you cannot identify each structure, leave the area for a groomer.
- Use extra control around the feet, armpits, groin, and belly.
- Keep the face, ears, throat, and tail fully visible before clipping nearby.
- Locate nipples, skin folds, joints, and other raised structures before every pass.
Face, ears, throat, and tail
The face and ear edges offer almost no margin for a startled movement. Do not point a running clipper toward the eye, mouth, ear canal, or loose lip. Maintain control of the full ear flap and tail before trimming near an edge. Close face patterns and breed styling are professional techniques, not beginner practice areas.
How to Use Dog Clippers Step by Step
How do you trim a dog's hair with clippers? The safest sequence is prepare, test, clip the easiest broad area, and stop before the dog or blade becomes uncomfortable. Grooming a dog with clippers begins with a simple goal. If you are learning how to groom a dog with clippers or how to groom a dog with electric clippers, ask a professional to demonstrate any style that depends on precise breed lines, hand scissoring, or close work around the face and feet.
- Set up a controlled work area. Use a stable nonslip surface, bright light, and enough room to move without pulling the cord. Place the comb, brush, oil, spare blade, towels, and rewards within reach. Ask another adult to help only if the dog already accepts that person's gentle restraint.
- Brush, comb, bathe if needed, and dry fully. A metal comb should move through the coat without catching before a guard comb is introduced. Do not use the clipper to bulldoze tangles. If the comb cannot reach the skin, reassess the coat or book professional help.
- Choose a longer guard and test it. Seat the guard on the compatible blade, then make one short pass on the shoulder or upper back where the dog is steady and the result is easy to inspect. Stop and change the setup if the guard pulls, chatters, flexes, or leaves a much shorter line than expected.
- Hold the blade flat and start with coat growth. Keep the broad face of the blade or guard against the coat rather than leading with the teeth. Use light pressure and a slow, steady pass in the direction the hair grows. Never dig the leading edge into the skin.
- Work in small, overlapping sections. Move from the shoulder across the torso where skin is relatively flat. Comb the coat between passes so you can see missed lines and changes in direction. Short overlapping passes are easier to control than one long push through heavy hair.
- Use your free hand to manage loose skin. Gently smooth the skin ahead of the clipper and reposition the dog so folds are visible. Do not stretch painfully. Slow down at the armpit, flank, groin, elbow, knee, and neck, where contours change and skin can bunch.
- Check the blade, guard, skin, and dog often. Switch off the clipper, clear packed hair, and touch the blade to the back of your hand. If it feels hot, stop and swap or cool it according to the manufacturer. Also pause for panting, repeated sitting, flinching, lip licking, escape attempts, or any sign that coordination is slipping.
- Comb, assess, and end the session. Stand back, comb the finished section, and decide whether another pass is truly needed. Uneven tufts are safer than irritated skin. Brush off loose hair, praise the dog, and save detailed face, foot, or outline work for another day if either of you is tired.
A First-Time Dog Clipping Plan
How do you use dog clippers for beginners? For a first session, aim to complete only an easy shoulder-and-torso test area. Spend several days on sound and vibration acclimation, prepare the coat completely, use the longest appropriate guard, and make a few with-coat passes. Stop after a calm success, even if the haircut is unfinished.
A short first session teaches you how the coat feeds into the guard, how quickly the blade warms, and which body positions your dog can hold comfortably. That information is more valuable than pushing for a full haircut and creating fear that makes every later session harder.
A Safari double-row flea comb can help check the pre-clipped coat for flea dirt around the back and tail base. Use it gently over a white damp paper towel; reddish-brown smears can support a flea concern. The fine teeth are not designed to remove mats, and a negative check does not rule out fleas.
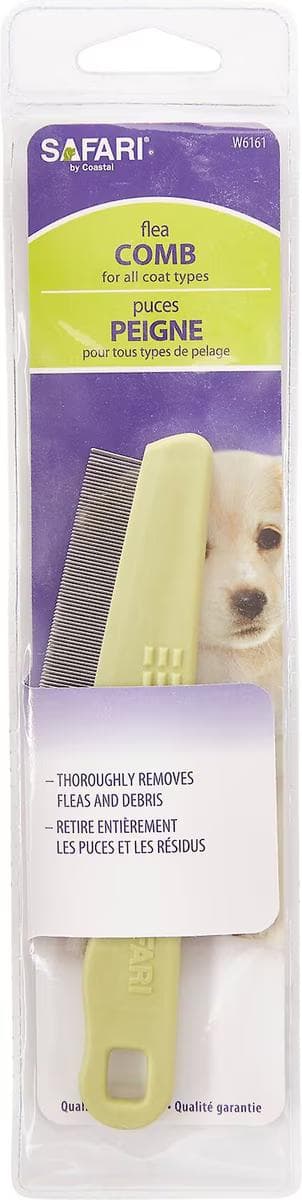
A fine flea comb can help you check for flea dirt during the pre-clip skin inspection. It is not a detangling tool for mats.
Webvet may earn a commission when you click through to Chewy, at no extra cost to you.
How to Hold Dog Clippers Safely
How do you hold dog clippers correctly? Use a relaxed, secure grip that lets the clipper follow the body without wobbling. The blade or attached guard should lie flat against the coat. The cutting teeth should not point into the skin. Keep your wrist neutral, and reposition your whole hand and the dog instead of twisting the clipper sharply around a contour.

Your free hand is part of the technique. Use it to feel the coat, locate bones and folds, and gently smooth loose skin before the clipper arrives. Keep fingers out of the blade path. At the edge of an ear, lip, tail, or skin fold, stop and change the dog's position so you can see the complete route.
Do not press harder when a clipper slows. Resistance usually means packed hair, a tangled coat, an unsuitable guard, a dull or dirty blade, low power, or too much coat in the pass. Switch off the tool and solve the cause. Force converts a tool problem into a skin-injury risk.
Should You Clip With or Against the Coat?
Which way do you use clippers on a dog? For a beginner, start with the direction of coat growth. Clipping with coat growth leaves a longer, softer finish, while clipping against growth cuts shorter and can raise irritation risk. A with-coat pass also makes it easier to see how much length the guard and blade combination removes before you commit to a closer cut.
Clipping against the coat lifts hair into the blade and usually cuts shorter. The result can vary by coat texture, body area, blade, and guard, and it can expose uneven color or skin more quickly. Against-coat work also increases the need for accurate skin control and heat awareness. Use it only when the desired style, equipment directions, and your experience support it.
Coat growth changes direction around the chest, flank, legs, and rear. Comb the hair and watch how it lies rather than assuming every pass should travel from head to tail. The Wahl clipping guide likewise begins with the natural direction of hair growth and a flat, guided pass.
Common Dog Clipper Mistakes and When to Stop
Common mistakes include clipping a dirty or damp coat, assuming a guard will pass through mats, starting too short, pressing harder when the blade slows, leading with the teeth, repeating passes over warming skin, and prioritizing a symmetrical haircut over the dog's behavior. Most are prevented by a slower setup and an earlier stopping point.
- Skipping the comb test: surface brushing can leave skin-level tangles that catch the guard.
- Using a loose guard: a partially seated attachment can detach or change cutting length mid-pass.
- Ignoring direction changes: the same guard can leave visibly different lengths when hair grows in different directions.
- Working over moving folds: skin must be visible and controlled before the clipper crosses it.
- Continuing with a hot, dirty, or dull blade: extra passes add heat and friction without improving the finish.
- Punishing movement or fear: force makes injury more likely and can turn later grooming into a larger behavioral problem.
If a minor nick occurs, switch off the clipper, apply gentle pressure with clean gauze, and call your veterinary clinic for advice. Seek prompt care for bleeding that does not stop, a deep or gaping wound, injury near the eye or another delicate structure, or any dog who seems weak, very painful, or unwell.
Can You Use Human Clippers on a Dog?
Is there a difference between dog clippers and human clippers? Yes. Dog-specific clippers are the safer default. Canine coats can combine guard hairs, dense undercoat, curls, and fine hair in ways that load a motor and blade differently from human scalp hair. A human clipper may stall, snag, heat quickly, or lack a compatible guard and blade system for the desired dog-coat length.
Some powerful clipper systems cross professional contexts, but the label, blade, guard, cooling instructions, and intended use must support the dog's coat. Do not assume a household haircut kit is safe because it looks similar. Use equipment designed or explicitly approved for pet coat clipping, and follow its instructions.
The reverse is also true: dog clippers should not be used as a substitute human grooming tool. Cleaning and disinfection requirements, blade exposure, and intended body areas differ. Keeping tools assigned to one purpose also reduces the chance that packed pet hair or skin debris moves between users.
Clean, Oil, and Cool Dog Clipper Blades
Blade maintenance is a safety task, not cosmetic polish. Loose hair packed between the blade and guard increases drag. Friction and long run time create heat. At every pause, switch off or unplug the unit, remove loose hair with the supplied brush, inspect the teeth, and follow the manufacturer's cleaning directions.

Apply clipper oil where the manual specifies, wipe away excess, and run the clipper only as directed to distribute it. The Andis clipper FAQ identifies proper oiling as essential maintenance. Water, household lubricant, and random aerosol products are not substitutes for a clipper-approved method.
Check temperature on the back of your hand throughout clipping. If the blade feels hot, stop contact with the dog. Swap to a clean, oiled compatible blade or use a clipper-approved blade coolant only according to the manufacturer's procedure. A cooling spray does not remove packed hair, repair a dull edge, or replace lubrication.
After the session, brush away hair, clean and disinfect as directed, oil the blade for storage if required, and keep the tool dry. Damaged, rusted, misaligned, or persistently dull blades need replacement or professional sharpening. Do not dismantle or sharpen a precision blade at home unless the manufacturer specifically provides that procedure.
After the Haircut: Check the Coat and Skin
Comb the finished coat and run your hands over the clipped areas in good light. Look for redness, heat, scratches, missed mats, and signs that a guard pressed too firmly. A few uneven lines can wait; repeated corrective passes over freshly clipped skin can cause irritation.
Brush or wipe loose cut hair from the coat and clean the work area so no sharp fragments reach eyes or paws. Give water and a calm rest. Watch for persistent scratching, rubbing, sensitivity, swelling, or worsening redness. Contact your veterinarian if discomfort continues or the skin looks injured.
Write down the guard and blade combination, direction, areas completed, blade-heat pattern, and anything the dog found difficult. That simple grooming log makes the next session shorter and helps a professional understand what happened if you need assistance.
Dog Clipper FAQs
Frequently Asked Questions
Can you use human clippers on a dog?
Dog-specific clippers are the safer default because canine coat density, motor load, blade design, guard compatibility, and blade heat can differ from human haircut needs. A household human clipper may stall, snag, or heat quickly in a dense coat. Use equipment labeled or explicitly approved for pet coat clipping and follow the manufacturer's blade, guard, cleaning, and oiling directions.
Can you use dog clippers on matted fur?
Can you use dog clippers on matted fur? Do not push a guard comb through it. The guard can snag, pull painful skin into the teeth, and hide sores or folds. A very small loose tangle may be combed out before clipping if it releases without pulling. Tight, broad, wet, painful, contaminated, or skin-level mats should be handled by a professional groomer or veterinarian, not cut with scissors at home.
How often should you clip a dog's coat?
How often should you clip a dog's coat? There is no universal schedule. Clipping frequency depends on breed, coat type and desired length, skin health, season, brushing routine, and how quickly the coat grows or mats. Some maintained pet styles need regular professional appointments, while many double-coated dogs need brushing and trimming rather than shaving. Ask a groomer to set a schedule for your dog's actual coat.
How do you keep dog clipper blades from getting hot?
How do you keep dog clipper blades from getting hot? Start with a clean, oiled blade and a fully brushed coat so the clipper is not fighting packed hair. Pause often, clear loose hair, and touch the blade to the back of your hand. If it feels hot, stop contact with the dog and swap or cool it according to the manufacturer. Clean, oil, and service dull or damaged blades instead of pressing harder.
The Bottom Line
How to use dog clippers safely comes down to preparation, conservative choices, and knowing when to stop. Keep these fundamentals in view throughout the session:
- Work only on a clean, completely dry, fully combed coat.
- Start with a longer guard and test the result on an easy shoulder area.
- Keep the blade flat and use light pressure instead of forcing a slow pass.
- Follow coat growth until you understand how the setup changes finished length.
- Smooth loose skin ahead of the clipper and keep every body structure visible.
- Check blade temperature repeatedly and end the session before control slips.
A calm partial trim is a better result than a complete haircut that causes pain or fear. Use a professional groomer for severe matting, delicate areas, complex styling, or behavior you cannot manage safely, and use a veterinarian for broken skin, lesions, pain, or sudden coat changes.
$65 · no membershipHave a health question about your dog?
A licensed vet can assess your dog over video and prescribe online when it's appropriate.
Talk to a vet- Licensed vets
- All 50 states
- same-day Rx
Webvet may earn a commission if you book.

Editor
The Webvet Editorial Team is the in-house group of pet-care editors and writers behind Webvet, operated by Smart Pet Collective. The team researches, writes, and maintains Webvet's pet health, behavior, and medication content. Every article follows a defined editorial process: research from reputable veterinary and scientific sources, careful drafting, mandatory review of medical content by a credentialed veterinarian, and dated publication. Health and medication articles are medically reviewed by a licensed veterinary professional before they go live and are kept current over time.
Veterinarian · BVMS MRCVS
Dr. Pippa Elliott, BVMS, MRCVS, is a veterinarian with nearly 30 years of experience in companion animal practice. Dr. Elliott earned her Bachelor of Veterinary Medicine and Surgery from the University of Glasgow. She was also designated a Member of the Royal College of Veterinary Surgeons. Married with 2 grown-up kids, Dr. Elliott has a naughty Puggle named Poggle, 3 cats and a bearded dragon.


