How to Clean Dog Ears Safely: A Step-by-Step Guide
Follow a gentle dog ear-cleaning sequence, choose appropriate supplies, adapt handling to your dog, and know when pain or prescribed treatment changes the plan.

BVMS MRCVS
Medically reviewed by Dr. Pippa Elliott, BVMS MRCVS · Last reviewed

This article contains affiliate links. Webvet may earn a commission when you buy through them, at no extra cost to you.
Learning how to clean dog ears starts with making sure cleaning is appropriate and comfortable. Use a suitable dog ear cleaner, gently massage the base of the ear, allow a head shake, then wipe away accessible material with cotton balls or gauze. Do not push swabs into the canal or hold down a dog whose ear hurts. A painful, smelly or discharging ear needs assessment before a grooming routine becomes repeated treatment.
The sequence below is for an ear your veterinarian considers suitable for home cleaning. Prescribed ear medicines may change whether, when and how you clean. If you are unsure which instruction applies, ask the clinic to demonstrate with your dog and the actual product.
- 1Check comfort and suitability before putting cleaner into an ear.
- 2Keep the nozzle and cotton swabs out of the deep canal.
- 3Let your dog shake, then wipe only the material you can reach easily.
- 4Stop if cleaning hurts; do not restrain a dog with a painful ear.
 Sponsored
Have a health question about your dog?
Talk to a licensed vet at Dutch over video or message, including nights and weekends.
Use code Pets30
Plans start at $11/month · covers up to 5 pets
- Licensed vets in most states
- Rx for 150+ conditions
- 4.7 on Trustpilot
Gather the right supplies
Set everything within reach before asking your dog to stay with you: the agreed dog-specific ear cleaner, cotton balls or gauze, a towel and a small reward your dog can safely eat.
Work on a stable surface where the dog can stand or rest comfortably. A large dog may be easier to handle on the floor than on a raised table. A helper can offer quiet support, without pinning the dog down.

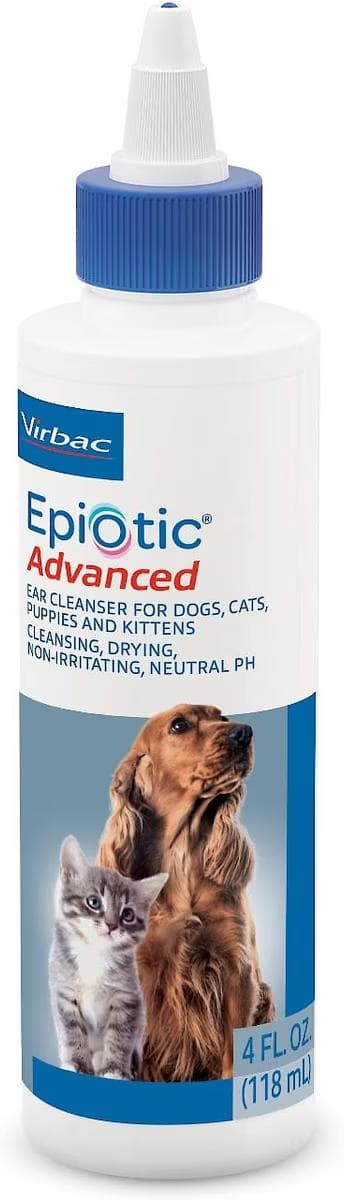
Virbac Epi-Otic Advanced is one routine cleanser to discuss with the clinic. Virbac describes it as a cleanser, which does not make it interchangeable with a prescription ear medicine. Confirm the product and whether both ears need cleaning.
Compare supplies in Petful's guides to dog ear cleaners and dog ear wipes.
Webvet may earn a commission when you click through to Chewy, at no extra cost to you.
- Read the current bottle instructions and any separate instructions from your veterinarian.
- Have enough fresh cotton or gauze for each ear; do not transfer used material between them.
- Choose a place where a head shake and splashes will be manageable.
- Leave cotton swabs, tweezers and improvised syringes out of the routine.
You do not need to assemble every product mentioned on this page. A liquid cleanser and an outer-ear wipe do different jobs, and more products can mean more unnecessary handling. Keep the routine simple enough that you know exactly what touched each ear and can explain it if the dog becomes uncomfortable.
How to clean dog ears step by step
The best way to clean a dog’s ears at home is to loosen appropriate debris gently and wipe what is accessible. Good ear care does not mean scraping until the canal looks spotless. VCA’s veterinary instructions describe cleaning solution, gentle massage, shaking and accessible wiping as separate stages. Do one ear at a time and pause between stages if your dog needs a break.

1. Settle your dog and check the ear
Let your dog get comfortable, then lift the ear flap gently. Look at what is visible and notice any unusual smell, redness, swelling or discharge.
If the dog cries, pulls sharply away or seems newly sensitive, stop before applying cleaner. The eardrum lies beyond what this surface check can show. After a bath or swim, dry only the outside with a towel; do not force a flush or insert a swab to get water out. New discomfort or repeated shaking needs advice from the clinic. Looking at the opening does not reveal the whole canal, and a normal-looking outside cannot rule out a painful problem deeper inside.
2. Apply the agreed cleanser without forcing the tip inside
Use the amount and method shown by the clinic or specified for the selected cleanser. Hold the bottle tip at the entrance, without pushing it down the ear or sealing the opening with the nozzle. Cornell cautions against pressure and deep insertion. Do not improvise a high-pressure flush, irrigation syringe or stream of shower water. Keep control of the bottle so a sudden movement cannot drive it inward.
3. Massage the base of the ear gently
If your dog remains comfortable, massage the base of the ear as directed to help distribute the cleanser and loosen material. This means gentle pressure from the outside, not rubbing a finger inside the canal. A squishing sound can occur when liquid moves. It is not proof that the ear is infected or that treatment has worked. Stop if massage is painful instead of pressing harder.
4. Let your dog shake
Release the flap and let your dog shake its head. Keep your face out of the splash zone and use the towel to protect nearby surfaces. Do not hold the ear closed to prevent the shake. Give the dog a moment to settle before reaching for cotton or gauze; trying to wipe during a moving head can turn a gentle task into an uncomfortable one.
5. Wipe accessible material, then finish
Wipe away loosened wax and other material from the ear opening and visible flap using soft cotton or gauze. Stay where you can see and reach easily. Do not chase a dark speck down the canal, twist material into a plug or use a cotton swab to reach around a fold. Reward calm participation and repeat on the other ear only if that ear also needs cleaning. Petful’s dog ear-cleaning guide provides a companion explanation.
 Sponsored
Vet care that's always there
Unlimited video calls and messaging with licensed vets for less than a typical vet visit. One membership covers up to five pets.
Use code Pets30
Plans start at $11/month · covers up to 5 pets
- Licensed vets in most states
- Rx for 150+ conditions
- 4.7 on Trustpilot
After wiping: check comfort, not just the cotton
The dog ear infection symptoms guide explains which changes in wax, odor, comfort and behavior need an examination. Their appearance alone does not tell you what caused the problem.
A dirty cotton ball tells you that some material came away; it does not identify the cause of that material.
Likewise, a cleaner-looking flap does not establish that an infection has cleared. Notice whether your dog settles afterward or continues scratching, shaking or avoiding touch. Report new discomfort or a rapid return of discharge instead of repeating the whole process until the cotton comes back perfectly white.

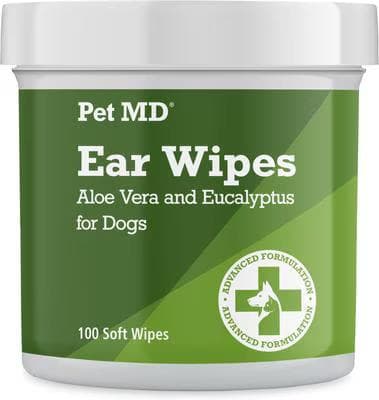
Pet MD Aloe & Eucalyptus Ear Wipes are another option for approved outer-ear wiping in suitable dogs over 12 weeks, according to the manufacturer. They do not replace liquid cleaning when that has specifically been prescribed. Use only the product that fits the planned job, without inserting a pad into the canal.
Webvet may earn a commission when you click through to Chewy, at no extra cost to you.
If your dog will not let you clean its ears
Do not force an unwilling dog through cleaning. Pain and fear can look similar, and a sudden change in tolerance deserves a veterinary check. For nonurgent care, Dogs Trust recommends gradual introduction and rewards. Practise a brief, comfortable touch near the ear before expecting the dog to accept lifting, a bottle and wiping in one session. A treat is a reward for participation, not a way to hide an unexpected painful touch.
| What happens | Safe adjustment |
|---|---|
| The dog moves away before you touch the ear | Pause; practise a smaller comfortable handling step when care is not urgent. |
| The dog flinches or cries when the ear is touched | Stop and contact the clinic; pain needs assessment. |
| The bottle movement startles the dog | Introduce the equipment separately before another nonurgent attempt. |
| The dog repeatedly turns or struggles | End the attempt and ask for a demonstration or another care plan. |
| Prescribed cleaning is due but cannot be completed | Call the prescribing team; do not replace missed care with force or a stronger product. |
The same stop rule applies when putting prescribed ear drops into an uncooperative dog.
For a fearful, aggressive or very wriggly dog, the safest method may be a different veterinary plan rather than a better restraint hold. Tell the clinic which stage failed: lifting the flap, applying liquid, massage or wiping. That detail is more useful than saying the dog is “difficult,” and it helps the team decide whether pain relief, handling support or in-clinic care is needed.
Adapting the position for puppies and different ears
For a puppy or small dog, choose a secure low surface and keep sessions short.
Check the product’s age restrictions rather than assuming a smaller amount makes an adult product suitable. A Chihuahua’s small ear does not require a smaller swab pushed inside it. The same accessible-wiping boundary applies regardless of size, and a puppy with discharge or persistent scratching needs assessment before repeated cleaning.
With a floppy ear, such as a spaniel’s or beagle’s, support the flap so you can see the opening without pulling it tight. Upright ears, as in many German shepherds and French bulldogs, can make the opening easier to see but do not make deeper probing safe. For a Labrador or golden retriever that swims, tell the clinic about water exposure so the cleaning plan addresses the actual history. Ear shape changes handling; it does not diagnose disease or automatically set a cleaning schedule.
- Keep long ear flaps supported rather than stretched or twisted.
- Move surrounding coat aside gently; do not clip toward a struggling dog’s canal.
- Ask for a demonstration if dense hair obscures the view, as it can in a Shih Tzu, poodle or doodle.
- Use the same stop rule for every breed: pain or repeated resistance ends the home attempt.
Choosing between cleaning products
Veterinary Formula Clinical Care Ear Therapy liquid contains active ingredients including ketoconazole, listed by the manufacturer. It is not simply another name for plain water or a neutral rinse. Confirm suitability for your dog’s assessed ear condition, and do not treat the product name as a diagnosis or a reason to continue cleaning a painful ear.
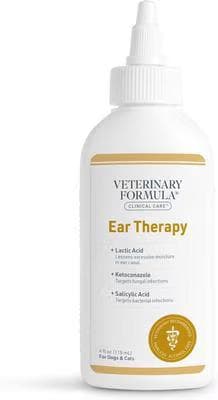
A medicated ear cleaner with lactic acid, ketoconazole, and salicylic acid that flushes debris and targets the yeast and bacteria behind ear infections. For dogs and cats.
Webvet may earn a commission when you click through to Chewy, at no extra cost to you.
Veterinary Formula Ear Therapy wipes are a different application format with active ingredients. The manufacturer instructs owners to use a fresh pad for each ear. A wipe can address accessible surfaces when appropriate; it cannot reach the entire canal without unsafe insertion. These are alternatives to consider with the clinic, not four products to layer into the same session.
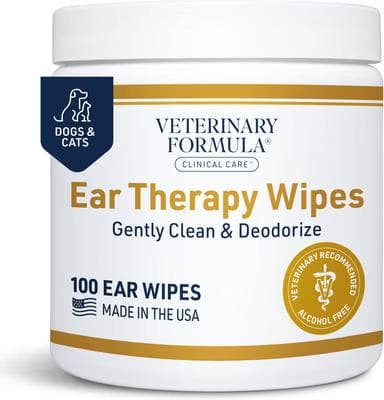
Alcohol-free ear wipes that gently clean and deodorize ears between deep cleanings, an easy maintenance step for itchy or smelly ears. 100 wipes, for dogs and cats.
Webvet may earn a commission when you click through to Chewy, at no extra cost to you.
Skin products and ear flushes are different
Before following any cleaning steps, identify the actual formulation. MiconaHex+Triz wipes and mousse are products intended to support skin health; their names do not make them an ear cleaner or ear flush. Do not pour a skin preparation into the canal or push a wipe down it. The yeast ear-cleaner guide separates these formats from ear flushing products. Ask the clinic to identify the exact product and demonstrate its intended application rather than adapting one format’s instructions to another.
How often to repeat the cleaning
Cleaning during prescribed treatment
| Instruction to confirm | Why it matters |
|---|---|
| Which ear and which product? | Do not assume the two ears or two products need identical care. |
| When is cleaning permitted? | A long-acting medicine may need to remain in the canal. |
| What if cleaning hurts? | Pain may need treatment before cleaning can resume. |
| When is the recheck? | Visible improvement does not establish that the original problem has resolved. |
Cleaning a suspected yeast infection
Avoid peroxide and alcohol
If you do not have an ear cleaner
Cleaning does not clear an ear-mite infestation
Why ingredients are not mite treatments
Coconut oil or peroxide does not provide a dependable treatment plan for an unexamined itchy ear. It cannot identify the parasite, account for other disease or establish that an infestation has cleared. The ear-mite home-remedies guide explains ingredient claims and what safe support can actually do while veterinary care is arranged. Do not turn a cleaning session into an experiment with a household oil.
When home care is not enough
Questions owners ask
Frequently Asked Questions
How do you get brown gunk out of a dog's ear?
First establish whether cleaning is appropriate. A small amount of wax can be normal, but a sudden increase, odor, pain or recurring discharge needs veterinary assessment. For an ear cleared for home cleaning, use the chosen cleanser, allow shaking and wipe only accessible material. Do not dig for the last brown speck. PDSA explains the difference between normal wax and concerning changes.
Should I pluck hair from my dog’s ears?
Do not make hair plucking an automatic part of cleaning. Ask the veterinarian whether hair is contributing to a particular ear problem and how it should be managed. Pulling at a painful ear or removing hair without an individual reason can add irritation. If dense hair hides the opening, ask for help rather than reaching deeper with cotton or tools. PDSA recommends discussing ear-hair care with the vet.

Editor
The Webvet Editorial Team is the in-house group of pet-care editors and writers behind Webvet, operated by Smart Pet Collective. The team researches, writes, and maintains Webvet's pet health, behavior, and medication content. Every article follows a defined editorial process: research from reputable veterinary and scientific sources, careful drafting, mandatory review of medical content by a credentialed veterinarian, and dated publication. Health and medication articles are medically reviewed by a licensed veterinary professional before they go live and are kept current over time.
Veterinarian · BVMS MRCVS
Dr. Pippa Elliott, BVMS, MRCVS, is a veterinarian with nearly 30 years of experience in companion animal practice. Dr. Elliott earned her Bachelor of Veterinary Medicine and Surgery from the University of Glasgow. She was also designated a Member of the Royal College of Veterinary Surgeons. Married with 2 grown-up kids, Dr. Elliott has a naughty Puggle named Poggle, 3 cats and a bearded dragon.
Related reading

Best Dog Boots for Traction, Weather, and Paw Protection

Vestibular Disease in Dogs: Symptoms, Diagnosis, and Recovery Timeline

In Home Pet Euthanasia: Cost, What Happens, and How to Choose a Provider
